1. Search for tax receipt
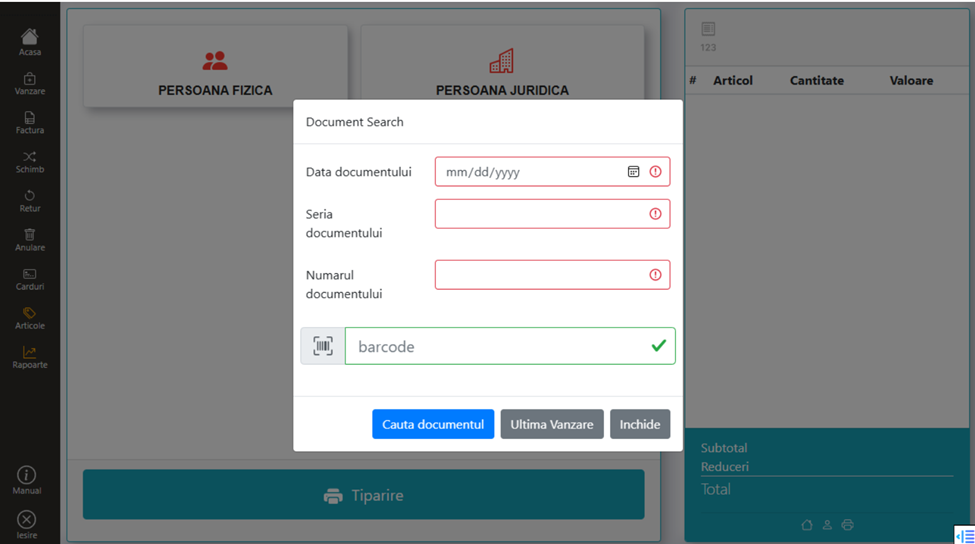
From the main menu, press the Invoice key. The search window opens where the data of the tax receipt for which the invoice is issued is entered:
- Document date — the date of the receipt is selected
- Document series
- Document number — can be found on the printed tax receipt
Quick search methods:
- Barcode scanning — the barcode printed on the receipt is scanned; Date, series, and number autofill
- Last Sale — used when issuing an invoice for the last sale made
2. Filling in billing data
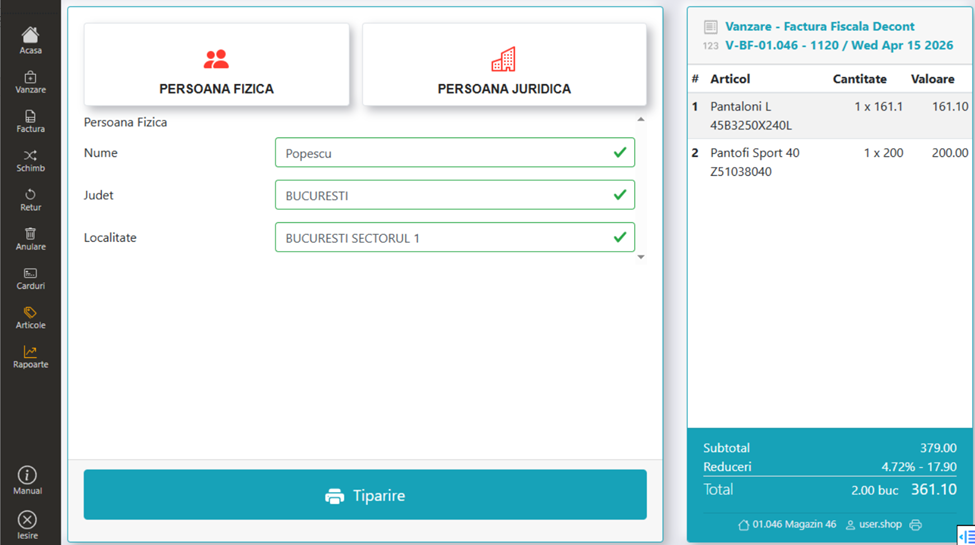
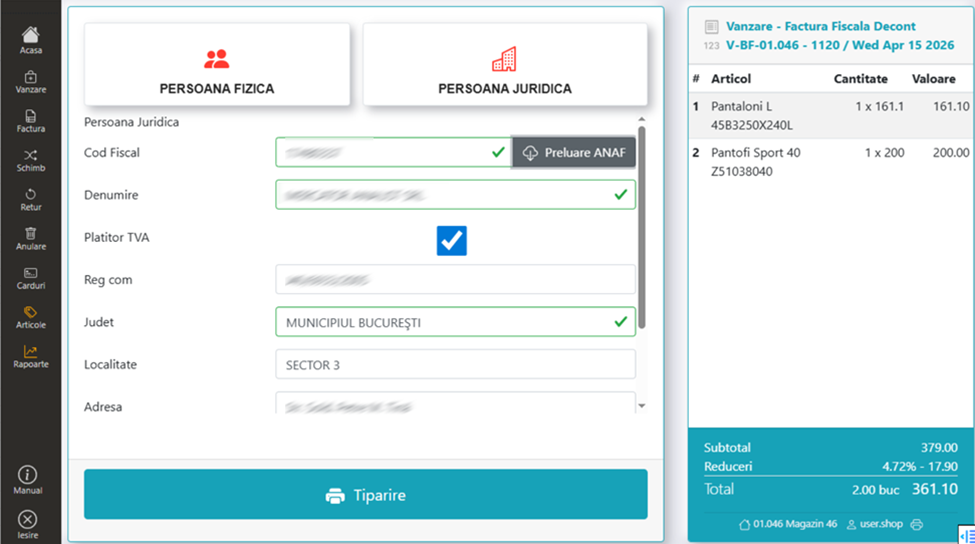
Once the receipt has been identified, the billing data window opens. The data of the tax receipt can be checked in the window on the right.
Individual:
- Fill in the customer's name
- The county is selected from the list
- The locality is filled in manually or selected from the list
Legal entity:
- Enter the company's CUI (with or without "RO" in front) and click Retrieve ANAF — the program automatically fills in the billing data based on the CUI
- Select the county from the list
- The locality is inserted
- Enter bank details: bank and bank account
3. Issuance and printing
Press the Print key to issue the document and print the tax invoice.
Reprint invoice
An already issued invoice can be reprinted from Reports → View Transactions. Select the Invoice transaction and click Print from the right window.
Billing from the transaction report
The invoice can also be issued later — the user searches for the receipt and invoices it. From Reports → View Transactions, select a sale and click the Billing option in the right window. Useful when the customer requests an invoice a few hours or days after the purchase.